Tuesday, August 26, 2014

Office Makeover Part 1: Wall

This semester I have officially become a grad student.  As part of this change, I have acquired an office.  It is only slightly bigger than a closet, but it is MINE.  Most importantly, it has a door, and thankfully I was one of the lucky few who got a window.  I am really enjoying the natural light, not to mention the view.

The previous office occupant didn't do much to improve the stark white closet appearance of the office space.  And by "much" I mean "nothing".  I get the feeling that she rarely used the space, due to the copious amounts of dust I had to clean up.  Here are some pictures I took the first time I walked into the office:


See what I mean?  I wouldn't be very happy working in this kind of environment.  Also, for perspective, the one time I had a meeting with the previous occupant, her office chair took up that whole space in front of the computer.  I attended the meeting from a chair in the hallway.  Classy, right?

Clearly, something had to be done.  This post includes details on how I created an office space that I enjoy being in for less than $50.

First, let's start with adding some color to a wall.  I thought about painting an accent wall (yes, the department does allow painting).  However, painting is kind of messy, and would require transportation of too much equipment across campus.  Also, it is rather permanent.  If I ever wanted to change the color of the wall (which is a likely possibility given that I have 5 years of school left), I would have to prime AND paint, and who wants to do that?

The budget-friendly painting alternative I found was to starch a piece of fabric to one of the walls.  Because I wanted to avoid seams on the wall, and because buying a single cut of fabric large enough to cover the wall would be extremely expensive at a place like Joann's, I went to Walmart and bought a king size flat sheet for about $15.  It wasn't quite big enough to reach the ceiling, but that isn't an issue.  It covered enough of the wall to add some color.  (Plus, there is a super annoying pipe sticking out of the wall that I didn't want to work around, so that is where the sheet ends :) )

Here are the primary blog posts that I used for instruction.  The first one is my favorite:
http://www.howaboutorange.blogspot.com/2011/09/how-to-wallpaper-using-fabric.html
http://kristendirmeier.blogspot.com/2008/09/purple.html

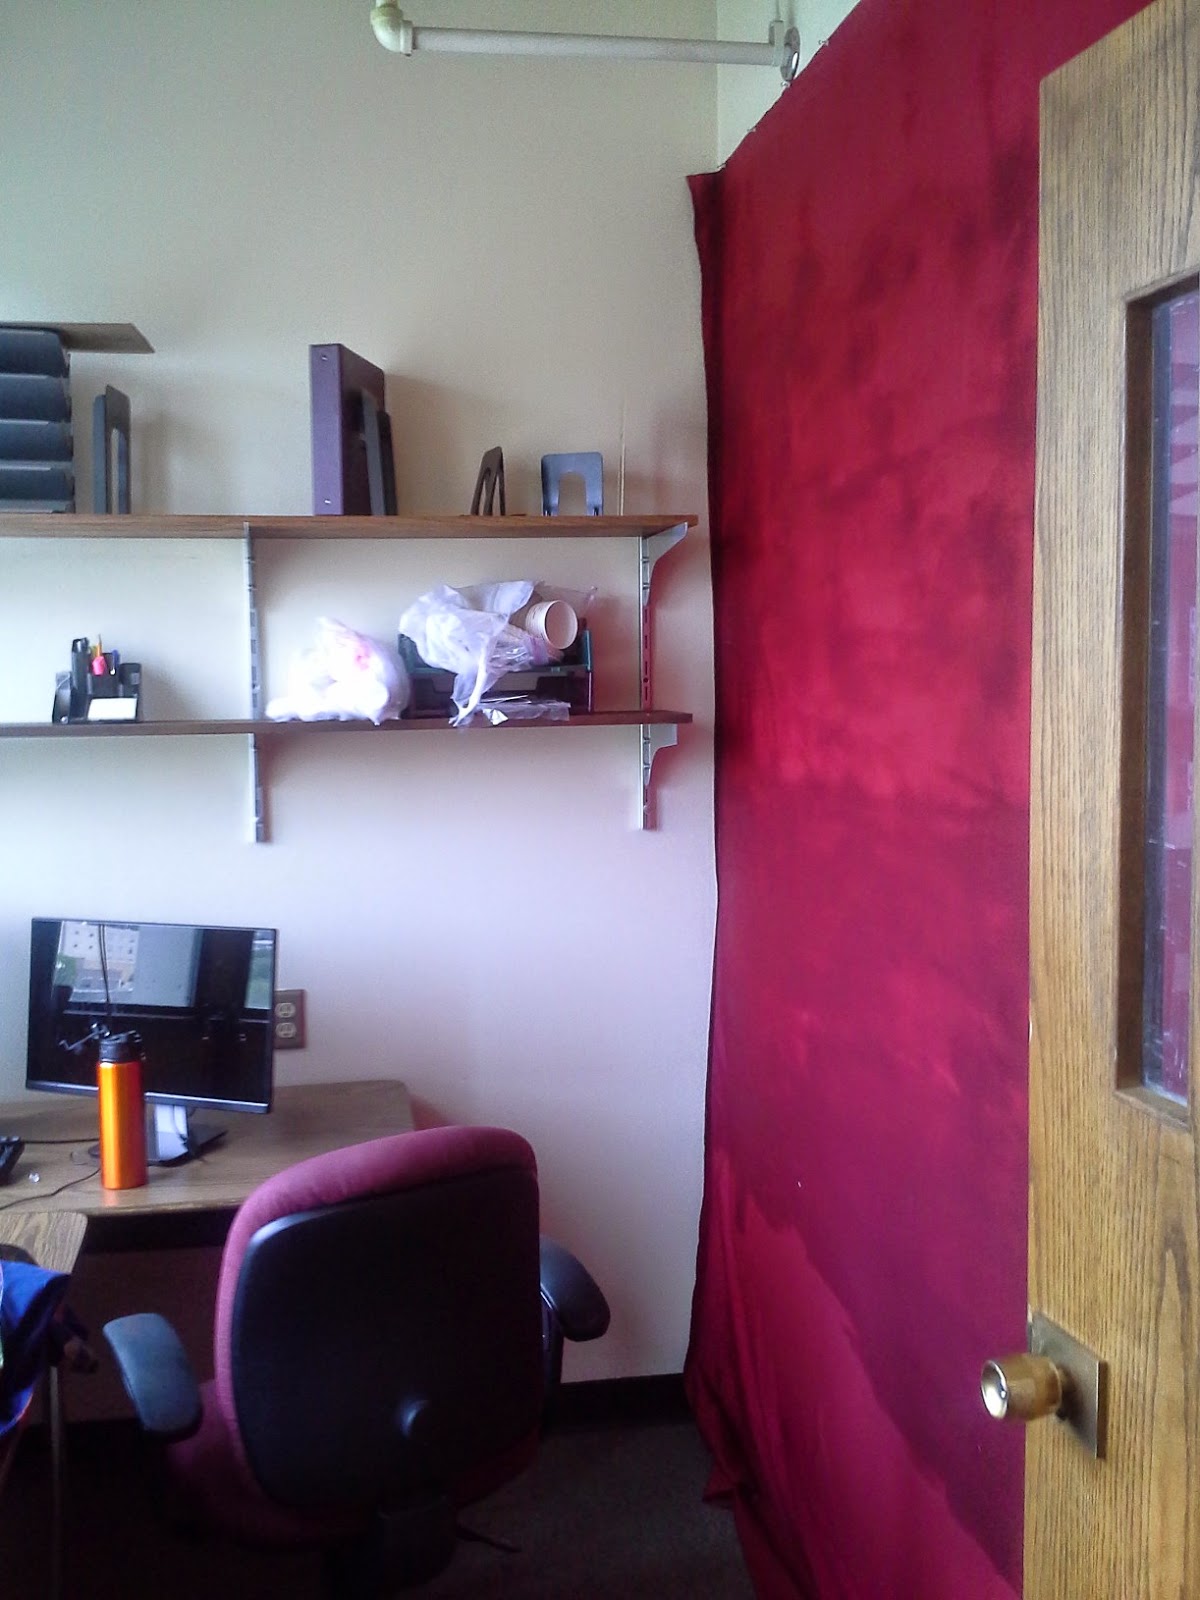
I ran into a few problems doing this.  First, my wall is bigger than a door.  I couldn't starch the whole thing, line up the sheet, and get it on straight before the starch dried.  I was doing this project alone (I don't think that another person would have been able to fit in that office), so I didn't have anyone to help hold the sheet up.  Therefore, on my first attempt I relied a little bit too heavily on the topcoat, hoping that if I put enough starch on the front surface of the sheet it would soak through and stick to the wall.  I will tell you right now that this is probably NOT the best idea.  It sort of worked...at least it looked pretty good when the sheet was wet:


That afternoon I went home with that self-satisfied successful DIY feeling.  But the next day I came back to discover that most of the wall hadn't really stuck to the wall and had dried in some pretty terrible looking wrinkles:


Clearly, there was a reason for putting a significant layer of starch directly onto the wall.  So much for taking the seemingly simpler route.

For the redo, I misted half of the sheet with water and peeled it off the wall.  (Yes, it does pull off nicely when damp, and doesn't affect the paint underneath).  I then quickly slopped a liberal amount of starch directly onto the wall.  I smoothed the sheet as fast as possible.  I still had to restarch a few spots, but it worked out pretty well.  I then repeated the process on the other side, though I had to tape up the still-wet first side to keep it from pulling off.


So, here are my tips that I would follow if I were to repeat this project:

-If you are covering a large space on your own, line the fabric up how you want it and secure it with tape or pins.  Then fold half of it back and tape it.  That way you can spread starch on the wall without crawling underneath the fabric or pulling the sheet up and ruining any previous work.  After the starch is on grab the taped back half and stick it to the wall.  It should still be lined up.

-I didn't experience any fabric shrinkage.  If you would like you can cut the fabric before sticking it on the wall.  It would be easier that way, but you also have to have good alignment skills to get it back up perfectly in place.

-For this project I had to make about 3 batches of starch.  Of course, I basically did the project twice.  To get a king sized sheet on the wall it would probably take about 2 batches.  (The recipe is in the first link).

-Finally, I would NOT put a layer of starch on top of the fabric like the second blog post instructs.  Maybe it was because I did it twice, but I ended up with white splotches all over the wall (hopefully you can sort of see them.  Maybe?):


Unless you are using a heavier fabric, the layer against the wall should be plenty to hold the fabric in place.  I think that I will attempt to bring some dish soap and a toothbrush up to campus one of these days to see if I can get the worst spots out.  I'm not sure why the starch dried clear in the other blog post...

Regardless of how imperfect it may be, it really helped the office space to look better:


The clean up for this project was super easy.  Starch and water don't stain, so I didn't have to worry about getting drips on the carpet- they just wipe up.  And the only things I had to bring to campus were a couple of mason jars full of starch, a foam brush, and a plastic rectangle for smoothing.  Nice, huh?

There are a couple more office makeover blog posts if you are interested in the finished product.  Make sure to leave any questions or comments below! :)

Wednesday, July 2, 2014

Daisy Crochet Skirt

I found this crochet pattern for a skirt online.  And it was free.  So, I decided to make it.


Awesome, right?

I got the pattern here:  http://www.crochetme.com/media/p/89123.aspx
I made the small size, as my hips are 38".
I crocheted holding two strands of No. 10 crochet cotton.  The skirt squares took almost exactly two spools of thread- I think the spools held about 1000 yards.  I had to go back to the store and get a bit more for the waistband.  I chose crochet cotton because it looks smoother and shinier than yarn.  I also think that yarn would have stretched a bit too much for this skirt.  (Note:  If you do decide to work with two strands, be warned that crochet cotton gets tangled extremely easily.  I may or may not have had experience with this.  Also, if you want to use one strand of crochet cotton, you could try to use No. 3.  I think that it would be thick enough.)

This is a very lacy pattern, so unless you want to use it as a swim suit cover-up, you probably need some lining.  I got 1.5 yards of muslin at Joann, sewed a seam up the side, pleated it in the back, and sewed it into the waistband.

Did I mention the waistband?

It is the only part of this skirt that didn't quite work out right.


Here is a close-up image of the waistband.  The instructions say to do a few rows of sc and dc or something.  I didn't think that sounded very sturdy, so I disobeyed the instructions and did a double thick row of sc.  It looks very slick, and is DEFINITELY sturdy....so sturdy that I have to pull it on over my head.  Not the best way of getting dressed, but it works.  Anyhow, if I were to make this skirt again I think that I would work out a zipper or a button closure or something, or maybe attach an extra wide piece of elastic instead of making a waistband.  Oh well.  It is still a pretty awesome skirt.


The Liesel Dress

I love watching musicals.  Naturally, I have seen The Sound of Music multiple times.  And every time I watch it, I notice the Liesel Dress.  You know, the one that she wears while dancing in the gazebo with the telegram guy?

Yeah, this one:


You love it too, right?

Making one of these dresses has been on my bucket list for a few years now.  I found a pattern online, but I didn't want to spend $15.  So, I invented my own.


Pattern details:
Pattern:  Butterick 6838
Size:  M  
Fabric:  Basic cotton fabric, with matching chiffon.
(For reference here are my measurements:  Hips, 38".  Waist, 26".  Bust, 34")

Yes, for the basis of this pattern I used a nightgown.  It was perfect.  The neckline matched Liesel's with a bit of modifying, and the loose fit of the nightgown allowed for some nice gathering.  In fact, it allowed for a little too much gathering. 

First, I made a muslin- the first official muslin that I have ever made.  I made the top half of the nightgown and added some gathers.  I made some adjustments to the neckline and cut out some new modified pattern pieces.

I cut two sets of pieces from the cotton.  I used the first set for lining the dress.  I paired the second set with the chiffon pieces.  Because chiffon is so see through, the seams would have been very visible.  So I stacked the chiffon piece on top of the corresponding cotton piece and treated them as a single piece.  

I used a sleeve from one of my other patterns- a pattern for a shirt that happened to have billowy sleeves.  This probably isn't necessary- I could have simply taken the nightgown sleeve and made it extra wide.  I gathered the top of the sleeve- if I made the dress again I think that I would gather it even more- and it IS possible to make elastic casing with chiffon.  Difficult, but possible.

The skirt is made out of one layer of cotton and two layers of chiffon.  I made a simple circle skirt and attached it to the bottom of the bodice.  The circumference of the circle skirt was only slightly bigger than my waist.  If I made the dress again I would allow for a lot of skirt gathering so that the skirt would poof out more.  Still, the skirt is VERY fun to twirl in.

Because I don't have a serger, I zigzagged the hems of the chiffon skirt layers.  Then I melted the edges.  With a candle.  It is extremely cool.  Here is a link to a video if you are interested:  http://www.youtube.com/watch?v=TfnQcn_SAGM


So....Does anyone have a gazebo that I can borrow?  Or know of a guy that wants to get all dressed up and jump off of park benches? :)


****NOTE:  If anyone wants more details or has any questions I will be happy to post more pictures and more thorough instructions.  Just let me know in the comments!!

Saturday, March 15, 2014

Simplicity 1803

A twirly dress with a sash!  Classically awesome.


Pattern details:
Pattern:  Simplicity 1803
Size:  8
View:  B
Fabric:  Cotton!
(For reference my measurements are:  Hips, 38".  Waist, 26".  Bust, 34")


The biggest alteration I had to make to this pattern was at the bustline.  During the first fitting I looked down and realized that the neckline bulged out- way too far.  By the last fitting I had added a 2" wide dart at the center seam.  Apart from that the rest of the pattern worked out fine.


Don't you love the sash fabric?  Oooh, and the nice, straight zipper edges? (a rather rare occurrence for this particular seamstress...) 

Here is the more classy belt + heels look:


Like usual, I used the muslin as the lining:


I need to remember to line the top half of the bodice with the same color as the outside of the dress.  I had to add top stitching around the whole neckline to keep the white from showing.  Actually, top stitching is a nice touch, but professional ironing skills are still required to hide the white edges- skills that I certainly do not possess.

Simplicity 1778: The dress that has never been worn

Now, if you are looking for something awesome to sew, don't be put off by the title of this post. This dress is one of the best things that I have ever managed to make. But seriously, where am I supposed to wear such a fantastic dress?


Pattern Details:
Pattern:  Simplicity 1778
Size:  10
View:  C
Fabric:  The biggest adjustment that I made to this pattern was to eliminate the zipper.  Instead of using the suggested fabrics I chose a black double knit, and cut out the pattern pieces one size smaller than I normally would have.  
(For reference my measurements are:  Hips, 38".  Waist, 26".  Bust, 34")


I got ridiculously excited over the texture on these front panels...


Note:  Before I cut out the front pattern pieces I added about 1.5" to the top of each section to raise the neckline a bit.  If I make this pattern again I would also think about widening the shoulder straps- especially in the front- to create a more narrow neckline.


Apart from eliminating the zipper, using knit fabric is also nice because it doesn't need any major edge finishing.  This is the only dress I have made that I have not added any lining.


This dress turned out absolutely perfect.  Now the trick is to find someplace to wear it.  Hey, it has only been in my closet for four months....any suggestions?  

Circle Skirt!

Circle skirts have got to be one of the most fun pieces of clothing to wear...they are so twirly!

Pattern Details:
This was a basic circle skirt.  I made a band to fit my waist, adding a bit of extra for zipper/seam allowances, then cut two half circles, the inside edge approximately 8" longer than the waistband piece.  Instead of gathers I used pleats to take in the extra fabric.  As always, I lined the skirt with muslin.

The only drawback to circle skirts is the amount of fabric required.  I did manage to find 60" wide fabric that had a very neat texture.  I'm fairly positive I managed to get by with only 2.5 yards, though it would have been nice to have some extra.


I also added a pocket into the sides.  This was the first time drafting my own pocket pattern- next time I think that I will make them slightly deeper.


Another successful one-evening long project.  Now I need to find some dances to wear it to!

Friday, March 14, 2014

High Waisted Skirt...No Pattern!

Somehow I managed to stumble across this tutorial online one day.  And I decided that it would be a nice, easy Friday-afternoon-homework-avoidance-project.  Now it is one of my favorite skirts to swing dance in.

Pattern Details:
The tutorial that I used for this pattern can be found here: http://www.thisbigoaktree.com/2012/04/high-waisted-sash-skirt-tutorial.html

I bought a couple of yards of clearance cotton, and used the leftovers from the Simplicity 2442 dress for the accent color.  The tan portion of the skirt follows the directions in the tutorial.  However, before adding the zipper I made a second skirt out of leftover muslin and added a wide orange band on the bottom.  I then did a tricky all-machine-no-hand-stitching zipper insertion that left no raw edges!!
Inside of the skirt.  Yes, the muslin was almost the same color as the skirt.  But I promise this is the inside layer.

Here is the inside of the zipper.  This is the first project that I managed to pull off a fully lined zipper with no hand stitching.


This was such an easy pattern to make, and it really didn't take much fabric.  It also looks quite nice with a belt instead of a sash: